<HEAD> <TITLE>Graphics/TITLE> </HEAD> <BODY> Here's the old icon computer in 104<br> <img src="iconbw.jpg"> </BODY>
Here is an example of a very simple HTML file with almost no formatting.
| Example | Code |
| For plain text you can just type. Notice that extra blanks are ignored as are return characters. | <HEAD> <TITLE>HTML Basics</TITLE> </HEAD> <BODY> For plain text you can just type. Notice that extra blanks are ignored as are return characters. </BODY> |
| Example | Code |
LargestNext LargestMediumSmallSmallerSmallest | <H1>Largest</H1> <H2>Next Largest</H2> <H3>Medium</H3> <H4>Small</H4> <H5>Smaller</H5> <H6>Smallest</H6> |
| Example | Code |
What We've SeenHere is an example of a large heading. You could use this for a title at the start of a page.Sub-HeadingThis would be for a subsection in the page. It would be a fairly major subsection. You would use smaller headings for less important subsections. |
<HEAD> <TITLE>What We've Seen</TITLE> </HEAD> <BODY> <h1>What We've Seen</h1> Here is an example of a large heading. You could use this for a title at the start of a page. <h2>Sub-Heading</h2> This would be for a subsection in the page. It would be a fairly major subsection. You would use smaller headings for less important subsections. </BODY> |
| Example | Code |
| bold italic underline bold & italic to get 3 spaces To get the text to look just like you typed it. |
<HEAD> <TITLE>Formatting Text</TITLE> </HEAD> <BODY> <b>bold</b><br> <i>italic</i><br> <u>underline</u><br> <b><i>bold & italic</i></b><br> to get 3 spaces <pre>To get the text to look just like you typed it.</pre> </BODY> |
| Example | Code |
| The school website The Computer Science website The Research Report which is located in the same directory as this html page is. |
<HEAD> <TITLE>HTML Basics</TITLE> </HEAD> <BODY> <a href="http://ntci.on.ca">The school website</a><br> The <a href="http://ntci.on.ca/compsci">Computer Science</a> website<br> <a href="a5_2017.html">The Research Report</a> which is located in the same directory as this html page is. </BODY> |
| Example | Code |
| This will be in red. This will be medium purple. See the web site for all the colours you can choose. There is a very extensive list. yellow |
<HEAD> <TITLE>Colour</TITLE> </HEAD> <BODY> <font color=red>This will be in red.</font><br> <font color=mediumPurple>This will be medium purple.</font><br> <font color=burlyWood>See the web site for all the colours you can choose. There is a very extensive list.</font><br> <font color=#FFFF00>yellow</font> </BODY> |
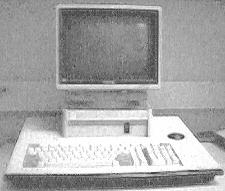
You can insert graphics that are saved in jpeg or gif format.
| Example | Code |
| Here's the old icon computer in 104 |
<HEAD> <TITLE>Graphics/TITLE> </HEAD> <BODY> Here's the old icon computer in 104<br> <img src="iconbw.jpg"> </BODY> |
| Example | Code |
Ordered List:
|
<HEAD> <TITLE>Lists</TITLE> </HEAD> <BODY> Ordered List: <ol> <li>one</li> <li>two</li> <li>three</li> </ol> Unordered List: <ul> <li>first</li> <li>second</li> </ul> Lettered List: <ol type=a> <li>one</li> <li>two</li> <li>three</li> </ol> Roman Numerals Start Specified: <ol type = i start = 5> <li>five</li> <li>six</li> <li>seven</li> <li>eight</li> </ol> </BODY> |
| Example | Code | ||||||
|
<HEAD> <TITLE>Tables</TITLE> </HEAD> <BODY> <table border=1> <tr><td>row 1 col 1</td><td>row 1 col 2</td><td>row 1 col 3</td></tr> <tr><td>row 2 col 1</td><td>row 2 col 2</td><td>row 2 col 3</td></tr> </table> </BODY> |
It is possible to put tables inside of tables. Indeed, you can generally nest any tag inside another tag. The example of the table and the code to generate it above is in fact inside a table.